As we all know, HP is one of the biggest names in the laptop and desktop industry and its peripherals. In addition, they are also manufacturers of tablet computers. When working on any of these devices you will probably need to take a screenshot at some point.
For example, if you are playing your favorite game and want to capture a moment, or when messaging with someone. Simply, it’s almost impossible that you’ll never need a screenshot. However, this can sometimes be complicated and may not necessarily mean that the procedure is always the same as on other devices you may have used before.
In today ‘s article, where we are going to introduce you several ways to take a screenshot, we will focus on HP laptops. So, here are 5 ways to do this on these portable HP devices. If you’re ready, let’s get started.
Page Contents
1. Default way

source:apowersoft.com
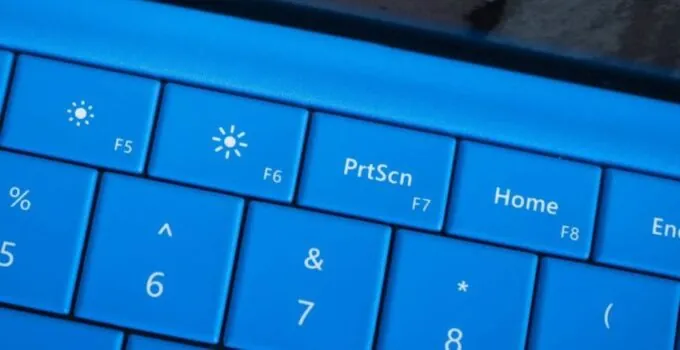
Given that many HP laptops are powered by the latest Windows 10 or Chrome operating system, the first way we will introduce you is to use a keys combination on your keyboard. First of all, you need to find the Print Screen key, which may also be labeled Prt SC or PrtScn. Then follow the next steps.
Step 1: Find the Windows key and press it simultaneously with the Print Screen one. This will allow you to take a screenshot of the entire screen. As a confirmation of the successful operation, the screen will instantly become dimmed.
Step 2: To be able to view and edit the screenshot later, you need to run some of the image editing software such as Photoshop, GIMP, PaintShop Pro or the famous Microsoft Paint.
Step 3: When the software is launched, press the paste shortcut, which is a combination of CTRL and V keys, or you can do this by right-clicking and selecting Paste.
Step 4: After you have done all the above-mentioned steps, you should see the screenshot taken, which should be saved in the PNG or JPG format in the folder you selected. And that’s it, you now have a screenshot taken.
This is by far the most common and traditional way of taking a screenshot on any Windows-enabled laptop. Continue reading this article and you’ll learn more ways to capture a screenshot in HP. There are some other cool tips and shortcuts covered on The Usables – which can be really beneficial for any type of user.
2. An alternative way

source:brightside.me
Another great way at your fingertips was actually became available about a year ago, when Microsoft released a new update for Windows 10. We’ll introduce the whole process in the steps below, and you don’t really need any additional software or applications.
Step 1: The keys combination you need to press on your keyboard is Windows key+Shift+S, of course at the same time. When you do, your monitor screen will turn white, while the mouse cursor will change to crosshair.
Step 2: Next you need to do is to select the part of the screen that you want to capture. When you do, the screenshot will be saved to the clipboard.
Step 3: Now you need to run some of the image editing software we listed above and when it starts, press CTRL+V simultaneously.
Step 4: The process is completed by saving the captured screenshot as a PNG or JPG file.
3. Snipping tool
Another way that doesn’t require the installation of third-party software is to use a snipping tool that is already installed as one of the bundled programs on your operating system, whether it is a Windows 7, 8 or 10 version. Follow the procedure below to capture a screenshot.
Step 1: Find a snipping tool on your computer and run it.
Step 2: Now, inside the app press “New” to determine which part of the screen you want to capture. You can also use the CTRL+N combination for the same procedure.
Step 3: Your mouse cursor will get a crosshair form, and you can now mark the area you want to screenshot by using rectangular outline.
Step 4: The last step is to save the captured image by clicking the disk icon located at the top of your screen in the application toolbar. Also, choose the format you want, JPEG or PNG and that’s it.
We must emphasize that snipping tool is very useful if you want to capture a screenshot in some other way. There is free-form (any shape of snip), window (for active window) and full-screen snip that allows you to capture the entire screen.
4. Snagit

source:support.techsmith.com
If you need a great tool for further editing a screenshot with many useful features, Snagit is the right solution. In addition to standard editing tools, Snagit also offers an option for capturing video of scrolling screen. The following procedure will show you how to take the screenshot in this way.
Step 1: First of all, download the Snagit application and when the download is complete, run it.
Step 1: Now press the red circle to allow the screenshot to be created.
Step 1: To capture a screenshot, click the camera icon. If you need a video, then click on the recorder icon.
Step 1: In this step, select the part of the screen you want to capture, after which the application will save it. You can now proceed to further editing and saving.
5. Apowersoft Free Screen Capture

source:softpedia.com
Another free and powerful application you can use to take a screenshot is Apowersoft Free Screen Capture. Similar to the aforementioned Snagit application, this one also offers you many ways of capturing, so you can select the entire screen, window or just a specific part of the screen. Also, there are editing tools, but also the ability to share on social networks as well as cloud space for all your screenshots you want to save. Follow the procedure below to take a screenshot.
Step 1: Download the application if you don’t have it installed and then run it.
Step 2: Open the window you want to capture.
Step 3: Click the camera icon in the application or press Print Screen button on your keyboard.
Step 4: Now your cursor will get crosshair and you need to select the part of the screen or the entire area you want to capture.
Step 5: Once you have done this, the tools we mentioned above will appear and you can use them to edit the image.
Step 6: Finally, save the screenshot to the folder you want and the procedure is complete.


